
We are starting a new BOM (block of the month) on the Esther Aliu FB group. It is a free BOM, so feel free to join the group and join the fun! I was thinking that some of you might like to follow along with how I approach starting a new applique project and I will be tracking my work on this blog for you.
Organize! No, panic is not the answer! It’s a BOM, not the state fair grand prize competition. It’s not a competition at all. We are not decorating the Eiffel Tower, nor the Sistine Chapel! We are making one part each month. Everyone gets one part to do. Some will finish that one part in one month, some will not. But it is okay either way. One part, just one. Eat the elephant one bite at a time. Relax, breathe…and organize!
Pattern! Print your BOM sections out. Pay attention to paper size. Esther’s patterns are A4 paper size, which we don’t have in the US. You can use legal size, or do what I do, which is print everything at 90% on US legal size. Read through the pattern before cutting and taping. Twice. Check the 1” square to be sure you printed it out correctly. I use my light box to tape the sections accurately. Check fabric requirements to make sure you don’t get caught short on your fabric.
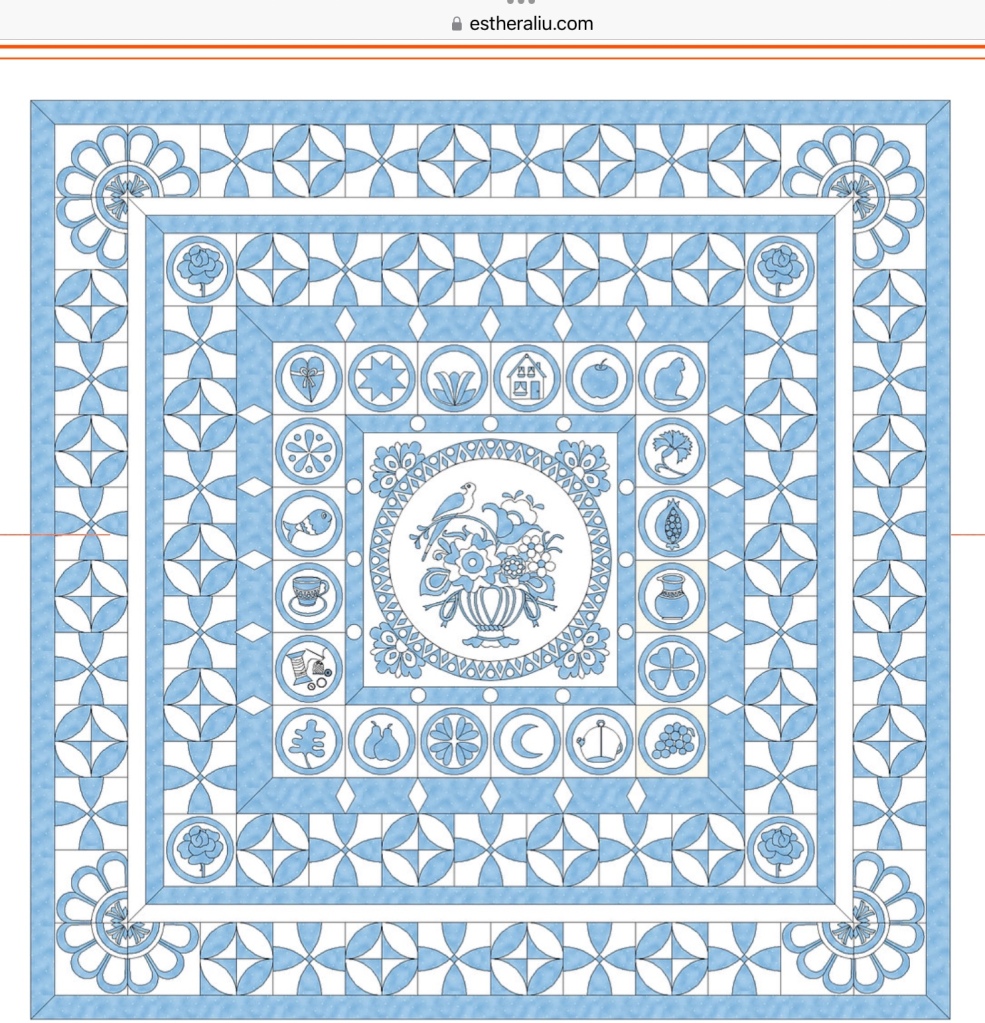
Fabric! Am I using my stash? Shopping for new? For this project, I will be sticking to stash. I recently bought (on a whim) a fat quarter bundle of Stonehenge. I have done two previous Stonehenge applique projects and now I know what to use this bundle for! I am adding a white dot on white from stash as well for contrast in the outer ring of the design.
Color! Always a critical question for me, because I love color. Do NOT feel compelled to select the color combo shown in the pattern. Use colors that bring you joy! If you follow my blog, you know that I like to select three key project colors – Two main color families and an accent. You cannot go wrong with the rule of 3 for colors. (And no, I don’t count white!). The colors in my fat quarter bundle will be my project colors and I may rummage through the stash again to locate any hiding Stonehenge bits from past projects.

Tools! I adore my light table. I live in a rainy, cloudy part of the globe and using “natural” light doesn’t work well here. My applique improved noticably when I got my light table from hubby for a birthday gift.
This pattern has a lot of circles, so I will be using Perfect Circle templates for all those demanding circles. I will be doing both turned edge machine and raw edge applique, which means checking my stock of Heat n Bond and washable turned edge media. I use the Cindy Needham Ultimate Stencil Circles template for larger circles. Applique glue and Elmer’s purple disappearing glue sticks (not the clear stuff) are critical tools as well. Make sure your supplies are “in stock” in your sewing area before getting too far into the project.


Starch! Before cutting anything, starch your fabric. This will make the whole project go easier and faster with fewer hiccups. I am startching all my fabrics before I move on to putting the pattern together.

Next week, I will show you where I started Part 1. It is a BIG part and there are options about what to do first. Where to start? Hmmm.
Happy project starting! I love starting a new project and getting everything organized. I have some FMQ to finish up on a couple of other projects, but will get this underway this week.
Lennea

Beautiful fabric choices.
Can’t wIt to see your progress!
LikeLiked by 1 person
Thank you!
LikeLike
Where can I find these patterns? I no longer can find the files section on Facebook.
LikeLiked by 1 person
The patterns are in the Esther Aliu Facebook group. You need to join the Esther Aliu group to access the group files and be on the group page to find the files. Or you can go to her website and buy the pattern, but it is free this year as a BOM if you belong to the group.
LikeLike
Esther Aliu FB group, not her blog page but the other one. Join the group. They are posting the BOM monthly in the feed.
LikeLike
Thank you.
LikeLike