
Time for totes! I thought I would share my tote bag making process this morning. There are no patterns involved.
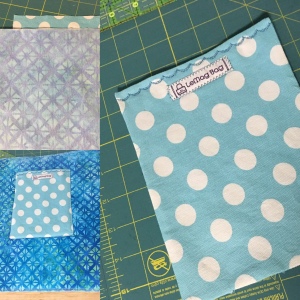
 Materials: Half yard of 54″ wide cotton deco canvas. 3/4 yd batik quilting cotton. 1/2 yd Soft n stable stabilizer from Byannie.com. 3 1/8 yards 1″ poly webbing. Small square of medium weight interfacing. Medium weight mesh. Photo of package below. Aurifil and Magnifico (Superior Threads) thread. Size 16 top stitch needle.
Equipment: Bernina 350 SE with walking foot and Babylock Imagine serger.
Cutting your pattern pieces: Start with a rectangle. Cut two pieces of your primary tote body fabric 17″x 15″. Cut two pieces of stabilizer and two pieces of lining the identical size. I prewash my fabric so that the tote will be washable. These pieces will make your tote body.
Cut a strip 2 1/2″ wide for binding Pocket B and the bag opening. If the bag is 17″ wide, you will need about 55″ of binding.
Cut a piece of canvas about 7″ x 8″. Cut a piece of medium weight interfacing and liner the same size. this will be your inside pocket.
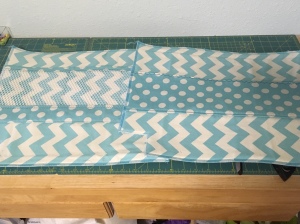
Cut a piece of canvas the width of the bag – 17″ x 6″ tall. Cut a piece of lining the same size for exterior pocket A.
Cut a piece of canvas the width of the bag -17″ x 3″ tall. Cut a piece of lining the same size. Cut a piece of mesh the width of the bag – 17″ x 6″ tall. These piece will make exterior pocket B.
1) Layer your main bag pieces…17″ x 15″ pieces of canvas right side out, stabilizer, and lining right sides out. Serge them together. Serge the other three pieces. Check to make sure they came out the same size!
2) Iron your binding by folding in two and pressing along the length. Fold one side of the long edge of the binding to the middle and press. Set aide.
3) Prepare your inside pocket. Layer your canvas and lining with right sides together. Layer your interfacing against the lining. Stitch 1/4″ on all sides, leaving a section about 3″ unsewn. Trim corners. Turn pocket right side out and iron, turning the opening edges to the inside. Center the pocket in the width of one side of the bag, about 4″ from the rectangle bottom edge. Pin. Stitch about 1/8″ from the edge.
4) Prepare your outside pockets. Align Pocket A pieces with right sides together. Stitch one edge with 1/4″ seam. Turn right sides out. Press. Stitch a deco edge along your seam on the right side. Serge raw bottom edges together. 

On the 2nd tote body piece, align your pocket piece, upside down with right sides together about 5″ from tote body edge. Stitch in place. Flip pocket A up and topstitch bottom seam. Serge or zigzag stitch sides to secure pocket edges.
5) Pocket B. align your 3″ strips, right sides facing your mesh section, along the bottom edge of mesh. Serge or stitch a 3/8″ seam. Turn to right side. Press carefully. The mesh can withstand some heat, but not too much. Topstich turned edge with a deco stitch.
Cut a section of binding to fit across the raw edge of mesh. Stitch open edge of binding to wrong side, press and flip binding over. Press. Top stitch folded edge of binding down on right side.
Serge or zig zag raw edges of pocket.

Align Pocket B – upside down with right side of pocket facing right side of first tote body rectangle (the one that the inside pocket was sewn onto). Align 1/2″ below your inside pocket stitching. Pin and stitch.
Flip pocket up and topstitch 1/4″ from bottom, serge or zigzag edges to secure.

6) Cut a 2 1/2″ section from each of the two bottom corners on both of the tote body pieces. This tote will be wider than tall, so the corners are cut at the bottom edge of the width of each body section. A 2 1/2″ corner will result in 4 to 4 1/2″ wide bag bottom. You can increase or decrease this corner cut to make your bag bottom wider or narrower. Zigzag edges of your cut.

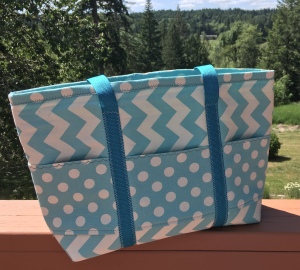
7) Attaching the tote bag straps. I had two colors of webbing compatible with my fabric, so I had to decide which color to use. In the photos, the aqua webbing color looks bluer than the tote fabric, but I can assure you that while darker, it is a good color match!

Cut 2, 56″ sections of poly webbing. I use a lighter flame to quickly seal the cut ends and prevent fraying. Pin the webbing, starting from the bottom of the tote body, measuring equidistance from each side of the tote. Don’t overlap your interior pocket! Pin 2″ from top of tote body.

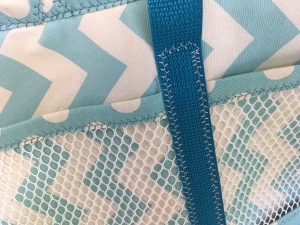 Stitch your webbing using a decorative stitch with matching or contrasting thread from the bottom up, turning at my 2″ mark and traveling down the other side of my webbing.
8) Time to sew the sides! Place your two tote body pieces, with straps attached, right sides together. Pin two sides and bottom between your cut out corners. Make sure your straps are not catching in the seam lines. Stitch using a medium length stitch and backtracking at edges to secure.

9) Making the tote corners. Bring the corner edges of your cut corners together on each side, aligning bottom seam with side seam, and pin with seams open. I stitch using a long stitch and then go over that stitching with a serger. You could also do a second reinforcing straight stitch line if you don’t have a serger. There is a lot of thickness here, so stitch slowy and don’t force. Let the walking foot and feed dogs do the work.

Turn your tote right side out. Time for the binding.
10) Binding your bag. Cut diagonal and iron under end of binding. Using sewing clips, align right side of raw edge of binding to inside of bag.

Sew binding to tote using a medium to medium long stitch, 1/2″ from edge. Trim raw edge to overlap and match angle of your folded binding edge.
Fold edge over and clip folded, outside edge of binding to front of tote. Stitch using a deco stitch. At the end, stretch folded edge a bit to cover the raw inner end. Stich up the fold and make 45 degree angle. Continue stiching to bottom of binding. This will secure the backside of the binding.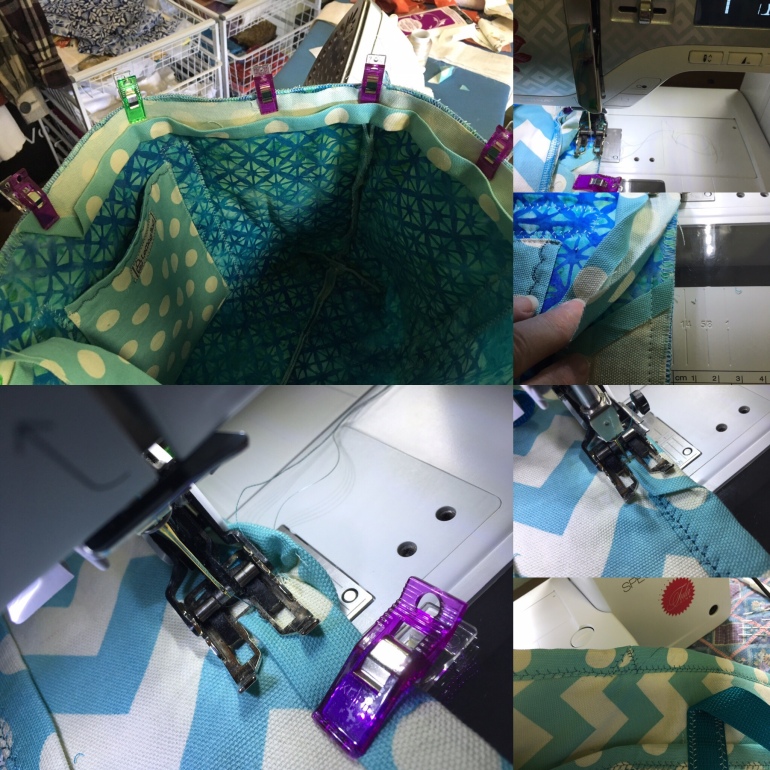
The tote bag is now complete!


 Happy stitching! Hope you enjoyed this post. Please let me know if you have questions.
Lennea

Thank you saved, loved it
LikeLike
You are welcome! 💕
LikeLike
Hi Lennea! What a great tutorial for making a bag. I love the fabrics you chose – they are really pleasant and eye catching. I’m going to PIN for the future, although I don’t think my bag would turn out as nicely as yours! ~smile~ Roseanne
LikeLiked by 1 person
I have made several dozen of these and, as well all know, practice makes everything better. But I am sure you can make a wonderful bag. Be sure to share a photo when you do, that would be awesome!
LikeLiked by 1 person
Fantastic tutorial Lennea, so easy to follow and so many step by steps to help the visual person like me!!!!!! Love the purple one you just mad and great idea with the carry sleeve for airports!!!!! Hugs glenda
LikeLiked by 1 person
I made one from a pattern a couple years ago and thought it was too fussy and complicated. Glad you found it easy to follow. I really enjoy making them.
LikeLike